


1.Download the IIS type SSL certificate from this site and unzip it:

2.Log in to the Windows Server server and upload the certificate to the server;
3.Press Win R to open the Run dialog box. Then, enter mmc and click OK.
4.In the Microsoft Management Console (MMC), add the Certificates snap-in. In the top menu bar of the MMC, choose File > Add/Remove Snap-in.

In the Add or Remove Snap-ins dialog box, select Certificates from the Available snap-ins section and click Add.

In the Certificates snap-in dialog box, select Computer account and click Next.
In the Select Computer dialog box, select Local computer: (the computer this console is running on) and click Finish.
In the Add or Remove Snap-ins dialog box, click OK.
5.In the left-side navigation pane of the MMC, choose Console Root > Certificates (Local Computer). Then, right-click Personal and choose All Tasks > Import.

6.Follow the on-screen instructions to complete the certificate import wizard.
Welcome to the Certificate Import Wizard: Click Next.
File to Import: Click Browse, select the PFX certificate file, and then click Next.
Before you can select the certificate file, you must set the file type to All Files (*.*).


Private key protection: Open the TXT password file, copy and paste the content in the Password field, and then click Next.

Certificate Store: Select Automatically select the certificate store based on the type of certificate and click Next.

Completing the Certificate Import Wizard: Click Finish.
After the The import was successful message appears, click OK.
7.Bind the certificate to a website.
Click the image..png icon and click Server Manager.
In the top menu bar, choose Tools > Internet Information Services (IIS) Manager.

In the Connections navigation pane on the left, click the server, click Sites, and then click your website. In the Actions section on the right, click Bindings.

In the Site Bindings dialog box, click Add.

In the Add Website Binding dialog box, configure the parameters for your website and click OK.
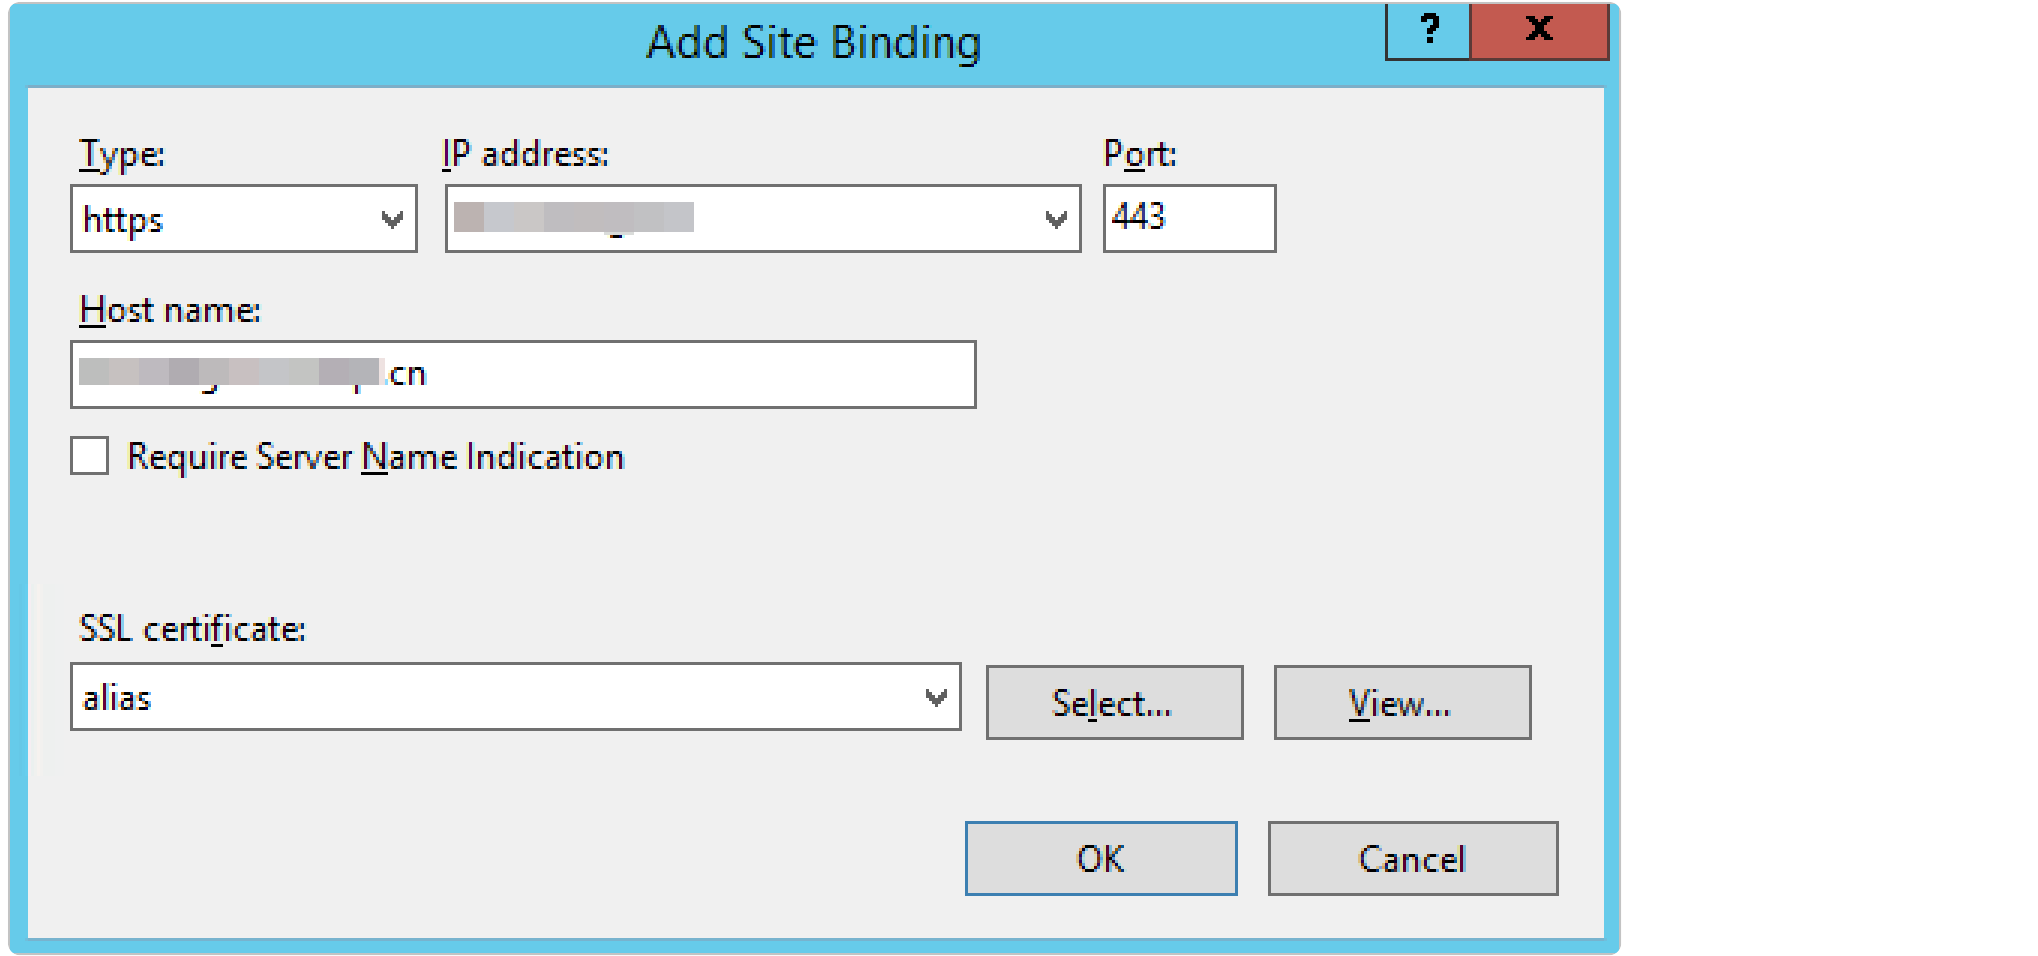
You can configure the parameters based on the following instructions:
Type: Select https.
IP address: Select the IP address of the server.
Port: Retain the default value 443.
Host name: Enter the domain name of your website.(eg. www.example.com).
SSL certificate: Select the certificate that you import.
After you configure the parameters, you can view the added binding of the https type in the Site Bindings dialog box.
In the Site Bindings dialog box, click Close.
Notice:
If the certificate fails to be installed on the server because of the selected IP address, clear the IP address and try again.


 supports the following regional currency settlement:
AlipayHK (Hong Kong, China): Supports HKD Settlement
TNG eWallet (Malaysia): Supports MYR Settlement
GCash Pay (Philippines): Supports PHP Settlement
DANA Pay (Indonesia): Supports IDR Settlement
Kakao Pay (South Korea): Supports KRW Settlement
TrueMoney (Thailand): Supports THB Settlement
Rabbit LINE Pay (Thailand): Supports THB Settlement")